New Dress…

Yep, sewing for a girl is very different than sewing for boys…

peekaboo

This dress basically the same pattern as the dress I made here but it has been a bit refined and simplified and the beautiful colours are really what make this dress so stunning!

(front and back)

New Dress Back of new dress

What I really love about this pattern is because of the tie in back, the bodice can be made a bit big and still fit months down the road… I love functionality of clothes that can grow with the child!! Wilhelmina can still wear her owl dress and her mushroom dress easily though the skirt is now a bit short which just makes it look more like a tunic instead of a dress…  the biggest  change that I made to this new dress besides making the skirt longer, was also to make it a bit fuller because I love the look of a full skirt…

New dress...

I love having my daughter wear handmade clothes…


Quilt progress…

I have been working on the Quilt each chance I get. It has changed design a few times but now I am really happy with the design I have in mind….

A few pieces are now pieced together with the sashing…

Blocks with Sashing

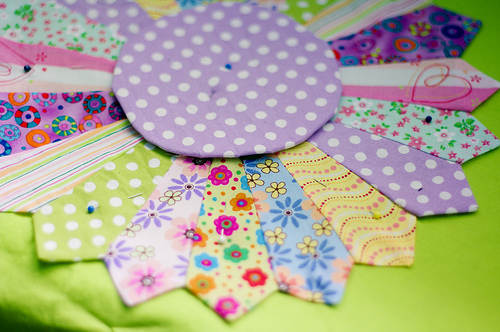
and my decision to try a dresden flower turned into a great center piece for the quilt…

Dresden Flower

(it isn’t really that lopsided…. really!)

Centre piece for Quilt

I still have have a lot of work to do. but I am loving what I already have….

Beginnings of a Quilt…

When I was pregnant with Xavier I made him a very simple quilt… it was one of my first sewing projects… it was simple, it made from old clothes and second hand scraps, it was small, and it sparked a love for sewing.

First quilt back of my first quilt...

Surprisingly, I haven’t quilted since…

I have a lot of material in my sewing room including many 5″ squares that I had cut when I was making some kid dresses a few years ago. I was wondering what I could do with them when I just decided to have fun and experiment… so… I cut the squares into strips and randomly sewed the strips together to make new squares. I put them side to side and thought that they would make a great quilt just as they were….

then I came across this video on how to make an easy pinwheel…

and from that, my colourful striped squares became these…

Square

I put a border around each piece, put batting and a back and made a block that is 9 1/2″ square… and am in the process of making more…

Block

I am just doing it little by little, quilting each block as I go without much of a plan. It is a lot of work and I am not sure just what exactly I will end up with, but I am having so much doing it and the results are already inspiring…

Winter banner…

I have been wanting to get more into embroidering and I thought that this would be a great project.

Not only did I start, but Xavier also joined in and helped… So it has become something that we can share…

Xavier embroidering

almost done

These mitten shapes are all the sizes of their hands….

Mittens

It is a work in progress but there are enough to put up now and I will be adding more once in a while as I make them…

Winter Banner

Winter Banner

I love what it adds to the space.

Salt dough ornaments…

I thought that making some Salt-dough ornaments would not only be fun for the kids and I to do but of course would add colour and more variety to our tree and create some great memories…

I loved doing this project also, so I got my hands dirty and had fun (which is why there are not many pics of the process)

To make the Salt-dough you will need

  • 2 cups of Flour
  • 1 cup of Salt
  • 1 cup of water

Mix the Flour and Salt together and the add the water. (start with half of the water and keep adding until you get the right texture… like pie dough)

I also took half of the dough and added cocoa powder to it so that I had a brown dough also.

We rolled the dough and started to cut out shapes…

Salt dough shapes for Ornaments

I made holes in the shapes with a straw so that we could string them up after and then put them on a lined pan and baked them in the oven at a low temp for a few hours until they were dry.

You can also leave them air dry for a few days….

Next was painting…

The boys and I all had a blast painting all of the shapes… we had about 3 dozen to do!

Salt dough Ornaments

Khéna

Colin painting a gingerbread man

I love the way they all turned out!

Salt dough Ornaments

Let the paint dry and then string them up!

Reindeer Dec10_807

DinoBell

Go to Top