Getting the last of the flooring out…

OK… well technically the last of the flooring is not out yet… but we are getting pretty close.

Sept13-310
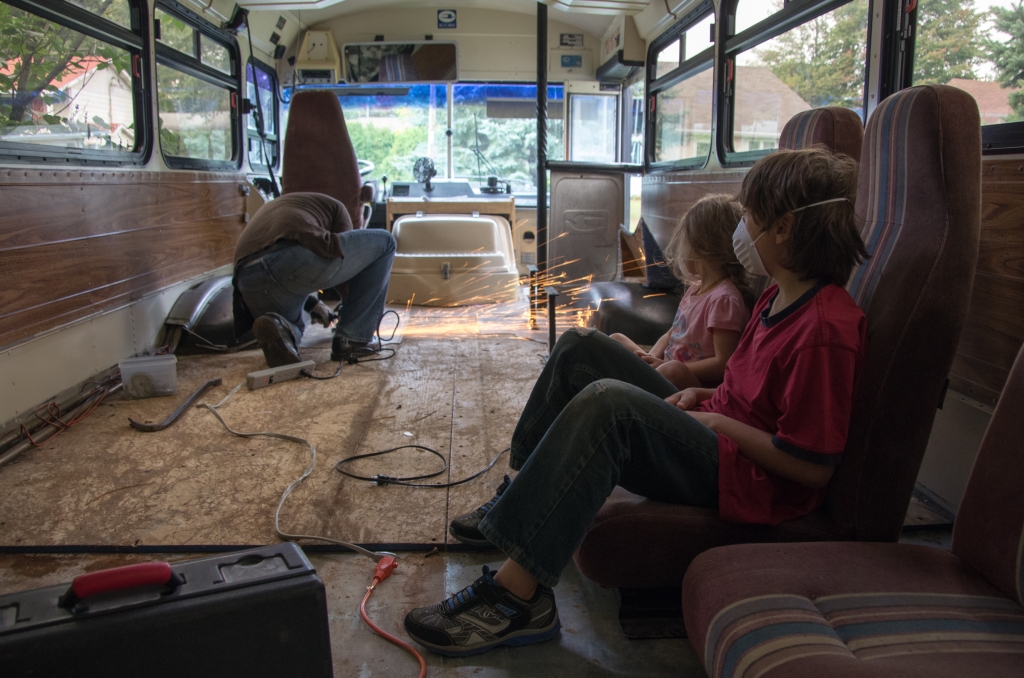
To get the last of the plywood out we needed to get the the seat brackets out which meant grinding them. There was just no other way.

Simon had never used a grinder before us getting the bus, but by the end of getting these brackets out and all of the screws that were around the wheel wells that refused to come out any other way, he was becoming a pro.

Sept13-300

While Khéna and Xavier didn’t stick around much on the days that Simon was working, Colin and Wilhelmina were always by our side. It is not like the other two don’t like helping, they just have other things they like to do.

Sept13-285


Seat Bracket out… working on those darn screws!


Sept13-304

Now that the brackets and screws are all out, nothing is holding the plywood in place, we so the next step will be to lift it out.

More Flooring out…

Getting the floors out of the bus is not a small task, just like most of the things that we need to do on the bus. As show in my last post, the back of the bus had rotten plywood but the rest of the bus had plywood that looked almost new. I hurt my shoulder at one point last week so as Simon used the crowbar while I concentrated on the screws holding the plywood down on the metal.

Aug13-103-2

Some came up easy, some needed a little help, some made me go crazy and some were just impossible. Finally I found the best strategy.

  • Use the right bit. By this I mean, the biggest bit you have that fits.
  • Using the tork wrench, loosen the screw slightly
  • Use Jig-a-loo or another lubricant and spray the screw so that it can go under a bit.
  • Tap the screw with the hammer a few times.
  • Use the tork wrench or the power drill/screwdriver to get it out slowly work it out. If it doesn’t work tap it a few more times and go onto the next screw while the lubricant gets into it a bit. Then come back to it.

There were even a few that didn’t come out yesterday as much as I tried and pleaded but before heading inside I sprayed/tapped them one more time and in the morning they came out like butter.

Here are the floors with most of the flooring off. Each piece of plywood was held by about 20 screws…

Aug13-104

A friend came over today and lent a hand and helped us get most of the plywood out. the pieces in back were a bit rotten but not as much as the other day and it came off in pieces that can’t be reused but didn’t fall apart either.

After that, the rest came out slowly…  maneuvering around the wheel wells, the heaters and the thick layer of caulking that was still holding on for dear life.

Aug13-76

There were a few spots of rust after that back section but most of the floors look like new. A very good thing.

Aug13-84


We had to stop with the floor while we go the three remaining seats out and we will have to grind those brackets out, but it feels great to know that we almost have all of the floors out now.

Oh and see that sink? It was a garage sale find for 35$ with the faucet. It is nicer than the one in our house 🙂

Aug13-88

Next steps:

  • Grinding the seat bracket screws out
  • Getting the rest of the floor covering, screws and plywood out.
  • Getting the front rail and the separater that is behind the drivers seat out
  • filling the holes in the floor, using the wire brush on the rusty parts and then painting the floor with Rust-Oleum paint.

More of the floor…

So after seeing the floor in the back section I was nervous about the condition of the rest of the floor though I did have a feeling that it would be better. So today I started to rip up parts of the rubber floor starting with the centre aisle. Most of the screws were stripped so I used the pry bar on most of it one screw at a time.

I shared this picture yesterday but it shows what the back section looked like yesterday in the centre aisle… and the sides were worse

Rotten, moldy wood that smelled awful and was falling apart in our hands…

Aug13-62

and we had checked a small portion that was on the other side of the wall and saw that the wood was better but it still didn't look that great, especially the condition of the screws…

20130815_134119 20130815_134138

But then as I starting to pry the middle aisle rubber up I was able to grab a hold of it and start pulling and what was under is much more promising!

20130815_134300

The Plywood is in great condition. You can even read the stamp on it.

20130815_134602

Not only that, but the screws are also in great condition and I can take them out no problem!

20130815_143942

So, hopefully, I will not only be able to take them out easily but I will also most likely be able to reuse the plywood in most of the bus. I looked under a section of flooring that would have been at the feet of one of the rows of passengers and it also looks great. But not only that. As I was taking the floor off a few splinters came up with the glue and instead of the moldy stink that we had in the back and that was still lingering, It smelled like wood. And it actually changed the smell inside of the bus.

And of course, if the wood looks good, there are good chances that there will be little rust underneath also.

20130815_144150

Next step is to move the heaters out of the way and remove the seats to continue getting the floors out while salvaging as much wood as I can.


The wall is out!

So I decided that an air compressor and an air chisel would be a good investment with all of the rivets that I have to take out.

Yesterday my mom came over with a friend and while she watched the kids, Michel and I went into the bus and worked. The air compressor was a great buy. I had done most of the rivets in the wall already so after getting the wood frame the previous owner put in we were able to start taking the wall apart. We had a few rivets left where I was having trouble getting to with the drill or with the cold chisel but the air chisel makes it much easier but only if the rivets are previously drilled.

Here is Michel taking out the last of the rivets with the air chisel.

Aug13-49


The wall was able to come out after that.


Aug13-51


Here is the framing that was in the wall which I will be able to reuse. The wall was also insulated.

Aug13-52


The boys had already gotten most of the screws out of the back portion so after the wall was out we started getting that part of the flooring out. Because that portion of the bus was for baggage etc with holes made by the baggage hooks it was an easy place for water to infiltrate and the floor in that section was soft and I knew the plywood was rotten.


Aug13-62

The plywood was a pain to get out. Luckily with it being wet some of the flooring was easy to peel off but where it was still dry it was completely glued down. Also because the plywood was swollen and moldy and the screws were buried and rusted. Some screws we were able to unscrew, some we could no find at all and many broke.

Aug13-64


We finally did get it out though.

I was looking forward though to seeing the steel underneath to make sure that was still in an acceptable condition and honestly it really isn't that bad. The rust is concentrated around the spots that had the baggage hooks but it is surface rust only. Where the plywood was a bit more dry, the floors were still nice.

Aug13-70


In the picture above you can see the floor rails a bit out. We got a bit of the flooring up and the plywood is dry and still in great condition and the floor is GLUED down and it will be a pain to get up. Though the friend that was over was so much help I found it a bit hard because he besides that back section that was visibly rotten, he doesn't get why we would pull up the rest of the flooring or pull out the walls to re-insulate. I get that it is a lot of work but I hate having to explain my reasons and then doubting myself.


Next on the list:

  • Continuing the floors
  • Figuring out how to get the heaters out (one or more)
  • Starting on the top luggage racks/ducts and getting the air conditioner out.


Go to Top