Demolition Done!

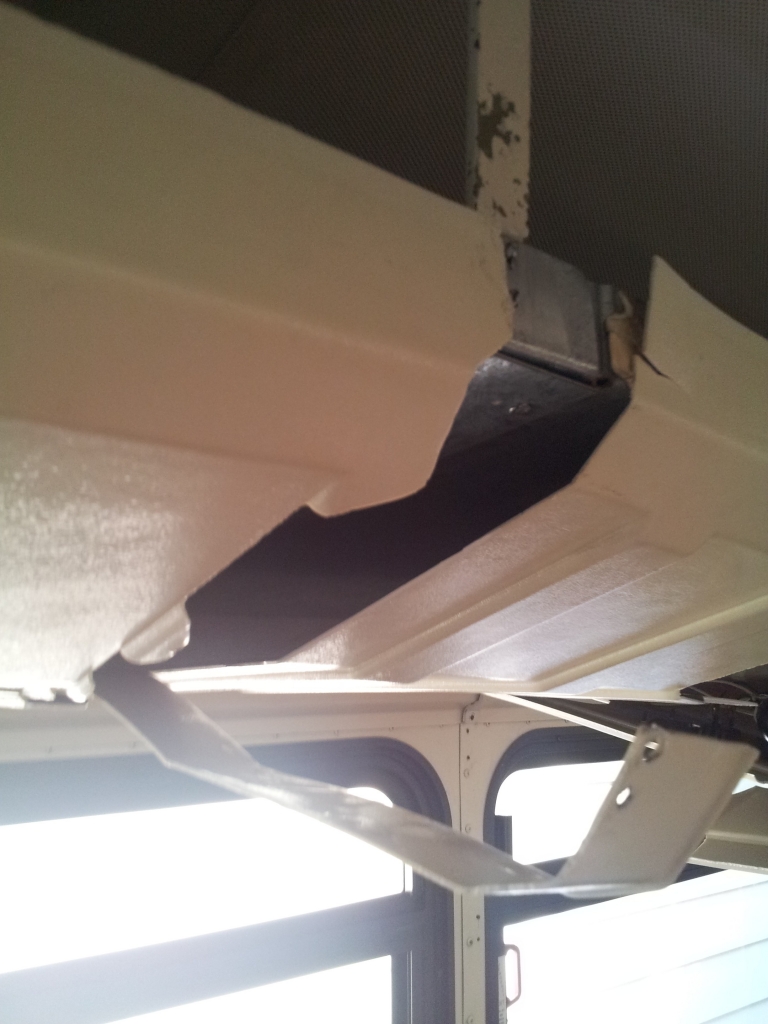
We are at a pivotal point in our conversion. The demolition stage is done! Looking on Kijiji last week I found someone that does mobile AC work. I sent him an e-mail and after a few back and forths we settled on a price and took an appointment for him to come Saturday. With his help the last of the luggage racks came out, the freon from the AC (some of which went into our car because we were having AC problems there also) and then the units themselves came out. It was a lot of hard and dirty work but it needed to be done and honestly, we were very happy to have a mechanic to do it! He also loves our project and has offered to help us with some other mechanical stuff that needs to be done. In exchange we gave him the units and he will be able to sell them for pieces or in whole and we will work out other exchanges as time goes by. 20140517_140303

We also had another friend come over on Sunday. Ludovic is a old cadet/high school friend of mine… (I have known him for 25 years! wow!). The last time I saw him he had offered to help us out. He is more into carpentry but having his help on Sunday kept us going and he was a great bit of help to finish dismantling the rest of the AC that was disconnected, getting the last of the floors out, getting the last traces of the luggage racks out and getting the drivers seat out. He also brought his beautiful dog Spot over for the day which the kids absolutely loved!

20140518_145250 
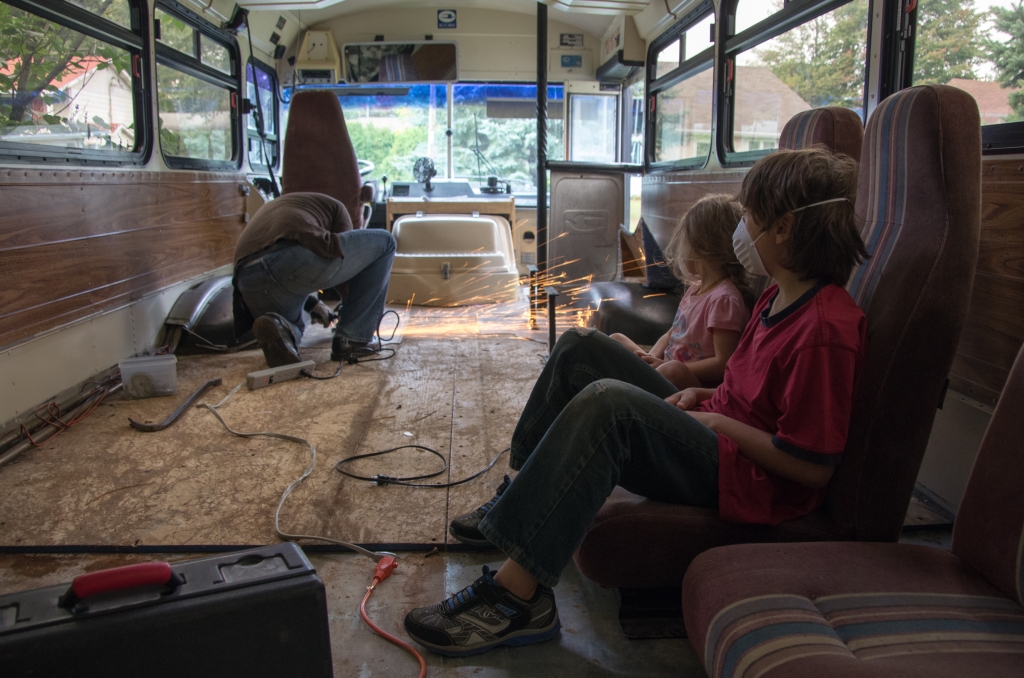
What Simon looked like after being under the bus for a while… 20140518_174358 Yesterday, Sunday was cleaning time… in the bus and in the neglected house. There were a few screws left to grind and then all the metal pieces to pick up and find a place for and then we swept the floors. May14-105May14-89 May14-117

All that is left in the Bus now are the heaters that are still connected and the table that holds our tools for now. The rest is done. Today I vacuumed and then washed the floors and suddenly the scent in the bus changed. it doesn’t smell like a bus anymore. I can’t wait until it smells like home.

Intro to the Bus!

Another forgotten post here… but it is never too late. I took this in the fall a couple of weeks before we stopped working on the bus…

Luggage racks coming out!

I am very late in writing this post!

Before the cold got the best of us and snow covered the bus, we did some work getting the luggage racks/air conditioning vents out.

This is what we were working with. The luggage racks/vents on each side the whole length of the bus with the air conditioning units in the middle that blow the air into the vents.

Sept13-306

Every time I went into the bus I would stare at them wondering how they would come out. Many people said I should just grind the brackets and just cut them out but it was more complicated and more simple than that at the same time. See down the middle there? On top of the rack. There are air conditioning units that use the racks as a vent. So cutting it all out wouldn’t work well at that section and it would ruin the brackets which would be great to be able to re-use.

So I looked at it another way. How did they get them in?

I pulled out the bumper strip that went along on the top and then started to see how it was all connected.

Rivets #1 were holding the shelf and the plastic together to the bracket. So those needed to be the first to go.

photo
These are Rivets #1…

20130930_130831

Once those rivets were out I took out the rivets that were holding the plastic at the joints. They could just be pulled out and snipped as needed and then I was able to start pulling and breaking the plastic vent cover. This stuff is sturdy plastic and it tore on a line but could easily span back and when it did it hurt. I had many scratches at the end from it.

20130930_143149
On this picture, you can see how I have ripped the plastic into strips. I took all of the vent covers off and popped the lights out of their sockets. They were all broken so I didn’t pay attention to trying to keep anything intact with the wires or lighting.
All of the front rivets are out and the whole shelf is being held by the back rivets and the rivets that hold the sections together.


20130930_143210

20130930_144343
After that I did the back rivets (Rivets #2). I started with the ones that were closest to where the shelves meet and not the ones at the end. If I were to work backwards, all of the weight would be disproportionate and it would make it harder. Once you get to the the rivets near the end. You need to either have someone close to hold the shelf and guide it down. (or make sure that the path is clear and do it yourself and be prepared to frighten everyone with the loud bang that makes people run out of the house to make sure you are still alive)

20130930_131117

Oh yes… Can you see that piece of carpet dangling on the other shelf in this next picture?
That is at the joint and you will need to pull and chisel it away to get to the rivets where the shelves meet. Then, with the shelf down, the middle of those rivets with be exposed and with the weight that is being put on them with the other shelf hanging, they will be easy to break by using a hammer and chisel.

oct13-169

Next you can take out the brackets by drilling into the rivets (#3 and #4 in the picture above).

Make sure you are using a drill bit that is larger than the hole. That way you take the head off and the rivet is free. Xavier loved that he was able to do all them on his own. The only thing is that he quickly learned that even if it is hot, you need a long sleeve shirt to protect you from tiny pieces of burning metal.

oct13-168
T
his is basically the point where we stopped last year…

The only thing left up are the sections that house the air conditioners and that are not being held by brackets but by the air conditioner units themselves and we needed to find someone to empty the freon from them in order to continue. I finally found someone to do it after calling everywhere but now we just need to wait until there is a bit less snow.

Why don’t we keep them? One reason is that only one side was working. The second reason, is that they blow into the vents which we took off. They also take up a lot of space and can only be used when the bus is running. So there are no real positives in keeping them in there.

So next step:

  • Get the Freon taken out.
  • Take out the last section of vent and the units
  • Take the rest of the plywood off the floor
  • Clean up, fill the holes in the floor and put a rust treatment on the floor

Getting the last of the flooring out…

OK… well technically the last of the flooring is not out yet… but we are getting pretty close.

Sept13-310
To get the last of the plywood out we needed to get the the seat brackets out which meant grinding them. There was just no other way.

Simon had never used a grinder before us getting the bus, but by the end of getting these brackets out and all of the screws that were around the wheel wells that refused to come out any other way, he was becoming a pro.

Sept13-300

While Khéna and Xavier didn’t stick around much on the days that Simon was working, Colin and Wilhelmina were always by our side. It is not like the other two don’t like helping, they just have other things they like to do.

Sept13-285


Seat Bracket out… working on those darn screws!


Sept13-304

Now that the brackets and screws are all out, nothing is holding the plywood in place, we so the next step will be to lift it out.

More Flooring out…

Getting the floors out of the bus is not a small task, just like most of the things that we need to do on the bus. As show in my last post, the back of the bus had rotten plywood but the rest of the bus had plywood that looked almost new. I hurt my shoulder at one point last week so as Simon used the crowbar while I concentrated on the screws holding the plywood down on the metal.

Aug13-103-2

Some came up easy, some needed a little help, some made me go crazy and some were just impossible. Finally I found the best strategy.

  • Use the right bit. By this I mean, the biggest bit you have that fits.
  • Using the tork wrench, loosen the screw slightly
  • Use Jig-a-loo or another lubricant and spray the screw so that it can go under a bit.
  • Tap the screw with the hammer a few times.
  • Use the tork wrench or the power drill/screwdriver to get it out slowly work it out. If it doesn’t work tap it a few more times and go onto the next screw while the lubricant gets into it a bit. Then come back to it.

There were even a few that didn’t come out yesterday as much as I tried and pleaded but before heading inside I sprayed/tapped them one more time and in the morning they came out like butter.

Here are the floors with most of the flooring off. Each piece of plywood was held by about 20 screws…

Aug13-104

A friend came over today and lent a hand and helped us get most of the plywood out. the pieces in back were a bit rotten but not as much as the other day and it came off in pieces that can’t be reused but didn’t fall apart either.

After that, the rest came out slowly…  maneuvering around the wheel wells, the heaters and the thick layer of caulking that was still holding on for dear life.

Aug13-76

There were a few spots of rust after that back section but most of the floors look like new. A very good thing.

Aug13-84


We had to stop with the floor while we go the three remaining seats out and we will have to grind those brackets out, but it feels great to know that we almost have all of the floors out now.

Oh and see that sink? It was a garage sale find for 35$ with the faucet. It is nicer than the one in our house 🙂

Aug13-88

Next steps:

  • Grinding the seat bracket screws out
  • Getting the rest of the floor covering, screws and plywood out.
  • Getting the front rail and the separater that is behind the drivers seat out
  • filling the holes in the floor, using the wire brush on the rusty parts and then painting the floor with Rust-Oleum paint.
Go to Top